Send barcodes from an Android PDA scanner to a computer
Handheld scanners are designed for use in industrial environments and warehouses, and even though they offer great portability, they often add more complexity to the process of acquiring and storing the barcode due to the software required to integrate them into the existing systems.
But that is where Barcode to PC comes in: if you already have Software on your computer and Want the PDA scanner to talk to it, you’ll just need to install the Barcode to PC app on your Android device and the corresponding server program on your computer.
Barcode to PC will automatically type barcodes on your computer coming from your Android handheld scanner by using the Wi-Fi network.
Installation
- Install the app to your Android PDA: Barcode to PC app
- Install the server program on your computer: Barcode to PC Server
Now launch the server program and the app, and they should pair automatically.
Setup
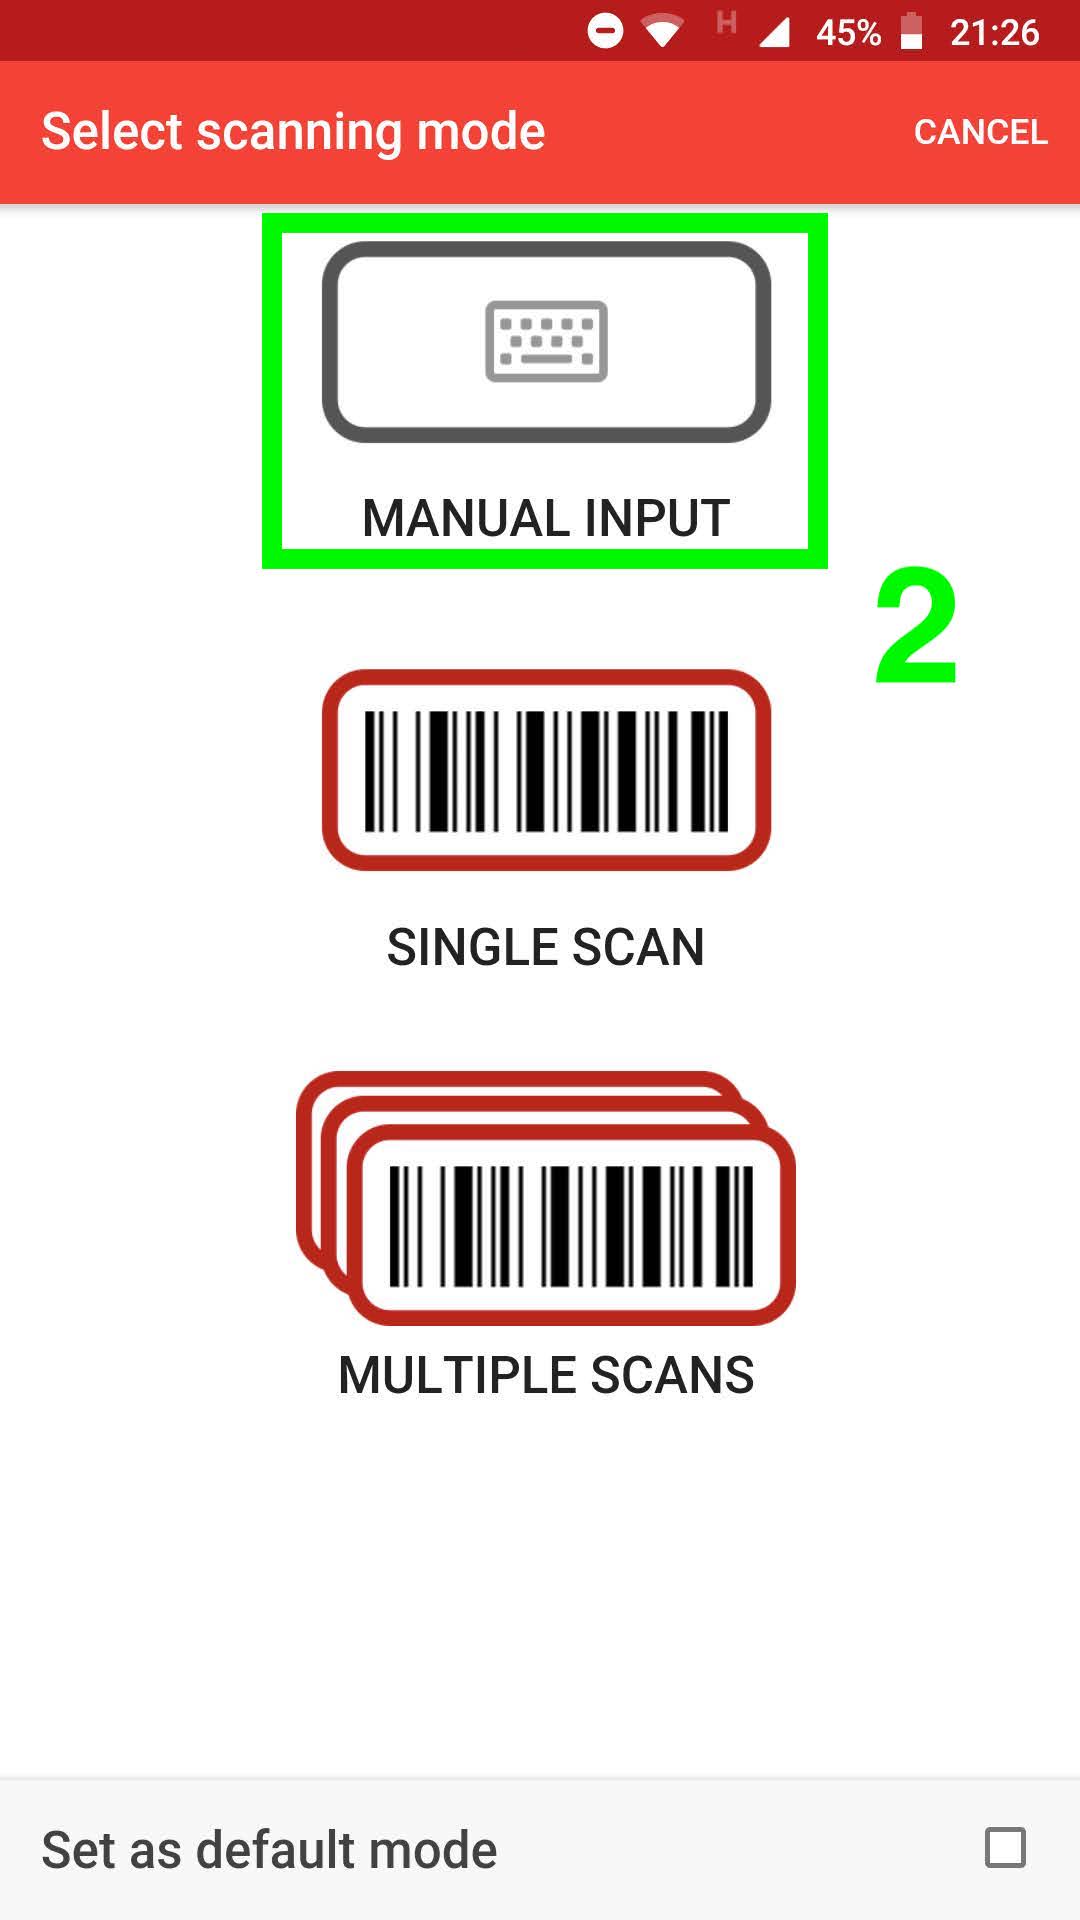
By default Barcode to PC uses the smartphone camera to acquire barcode, but since the goal is to use the integrated physical scanner of your device you’ll have to select the MANUAL INPUT mode by following this procedure:
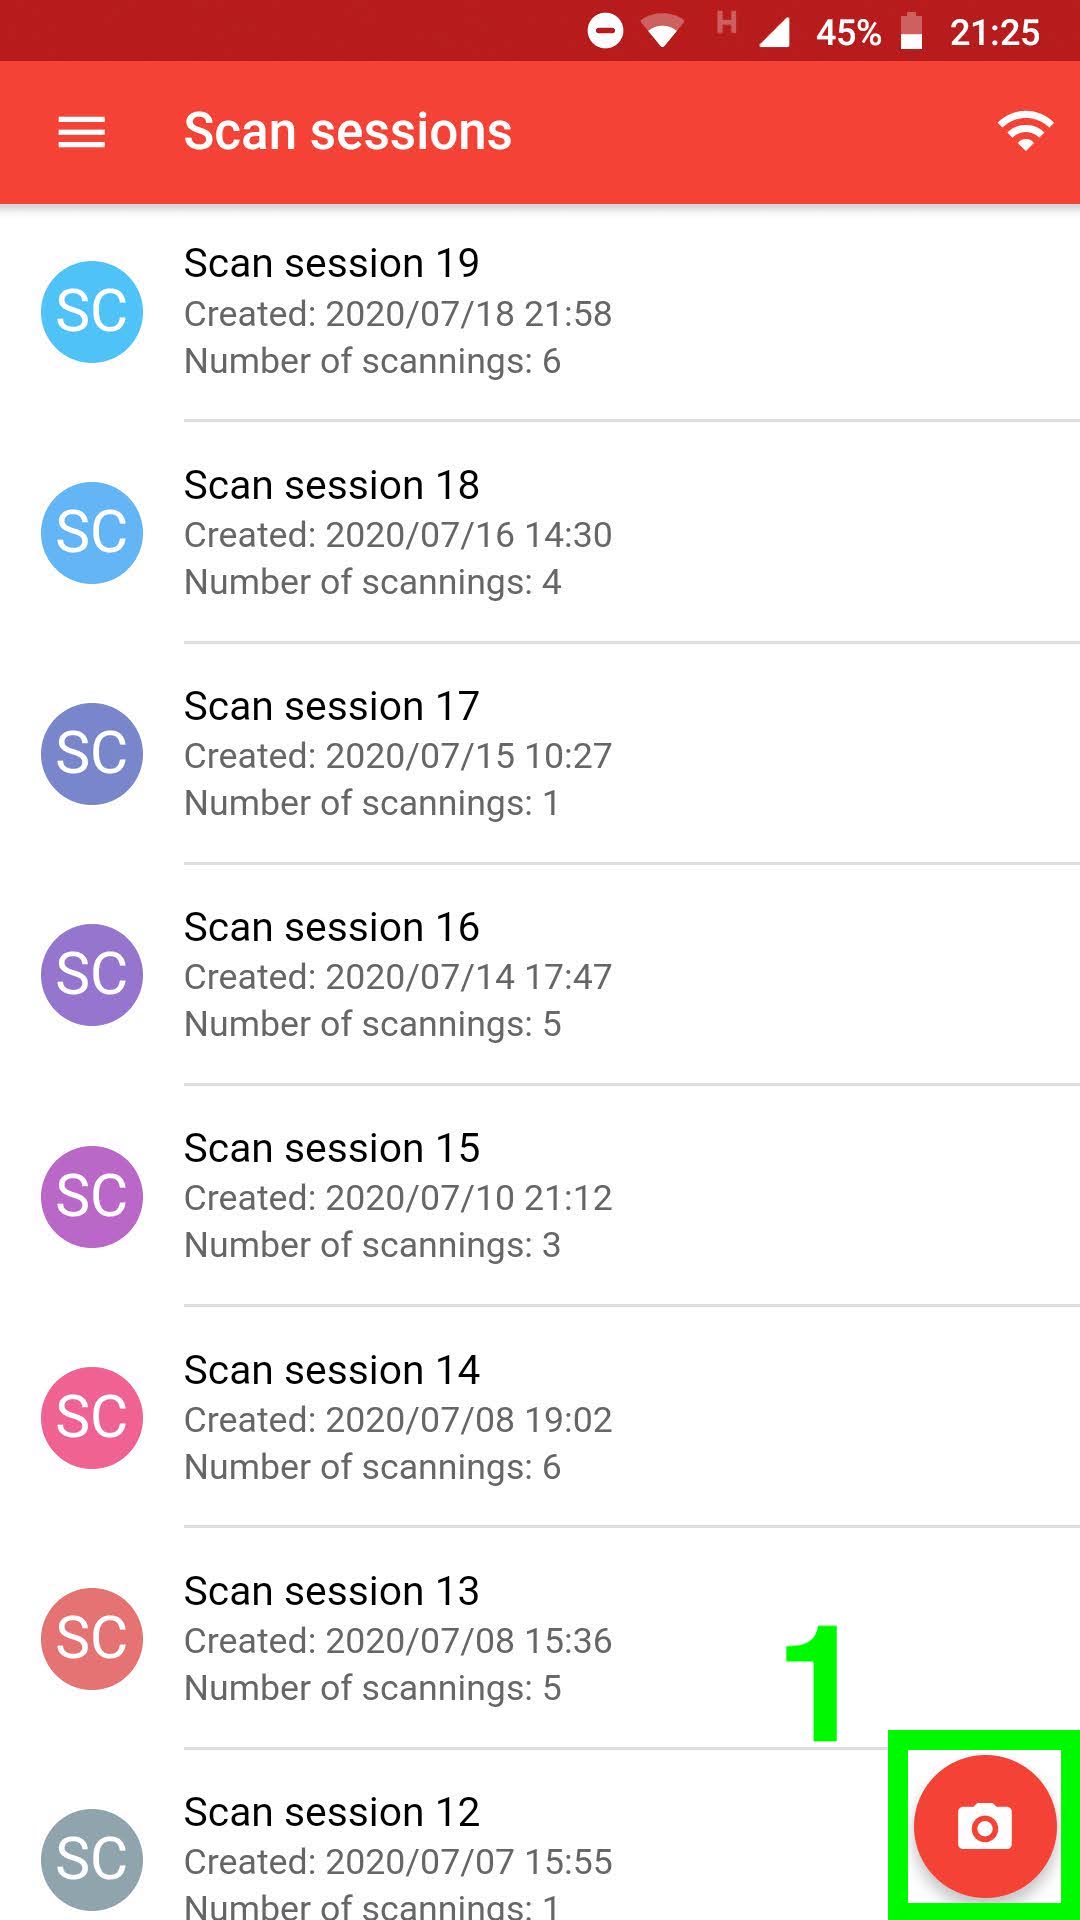
Step 1 – Tap the Camera icon
Step 2 – Tap the MANUAL INPUT icon
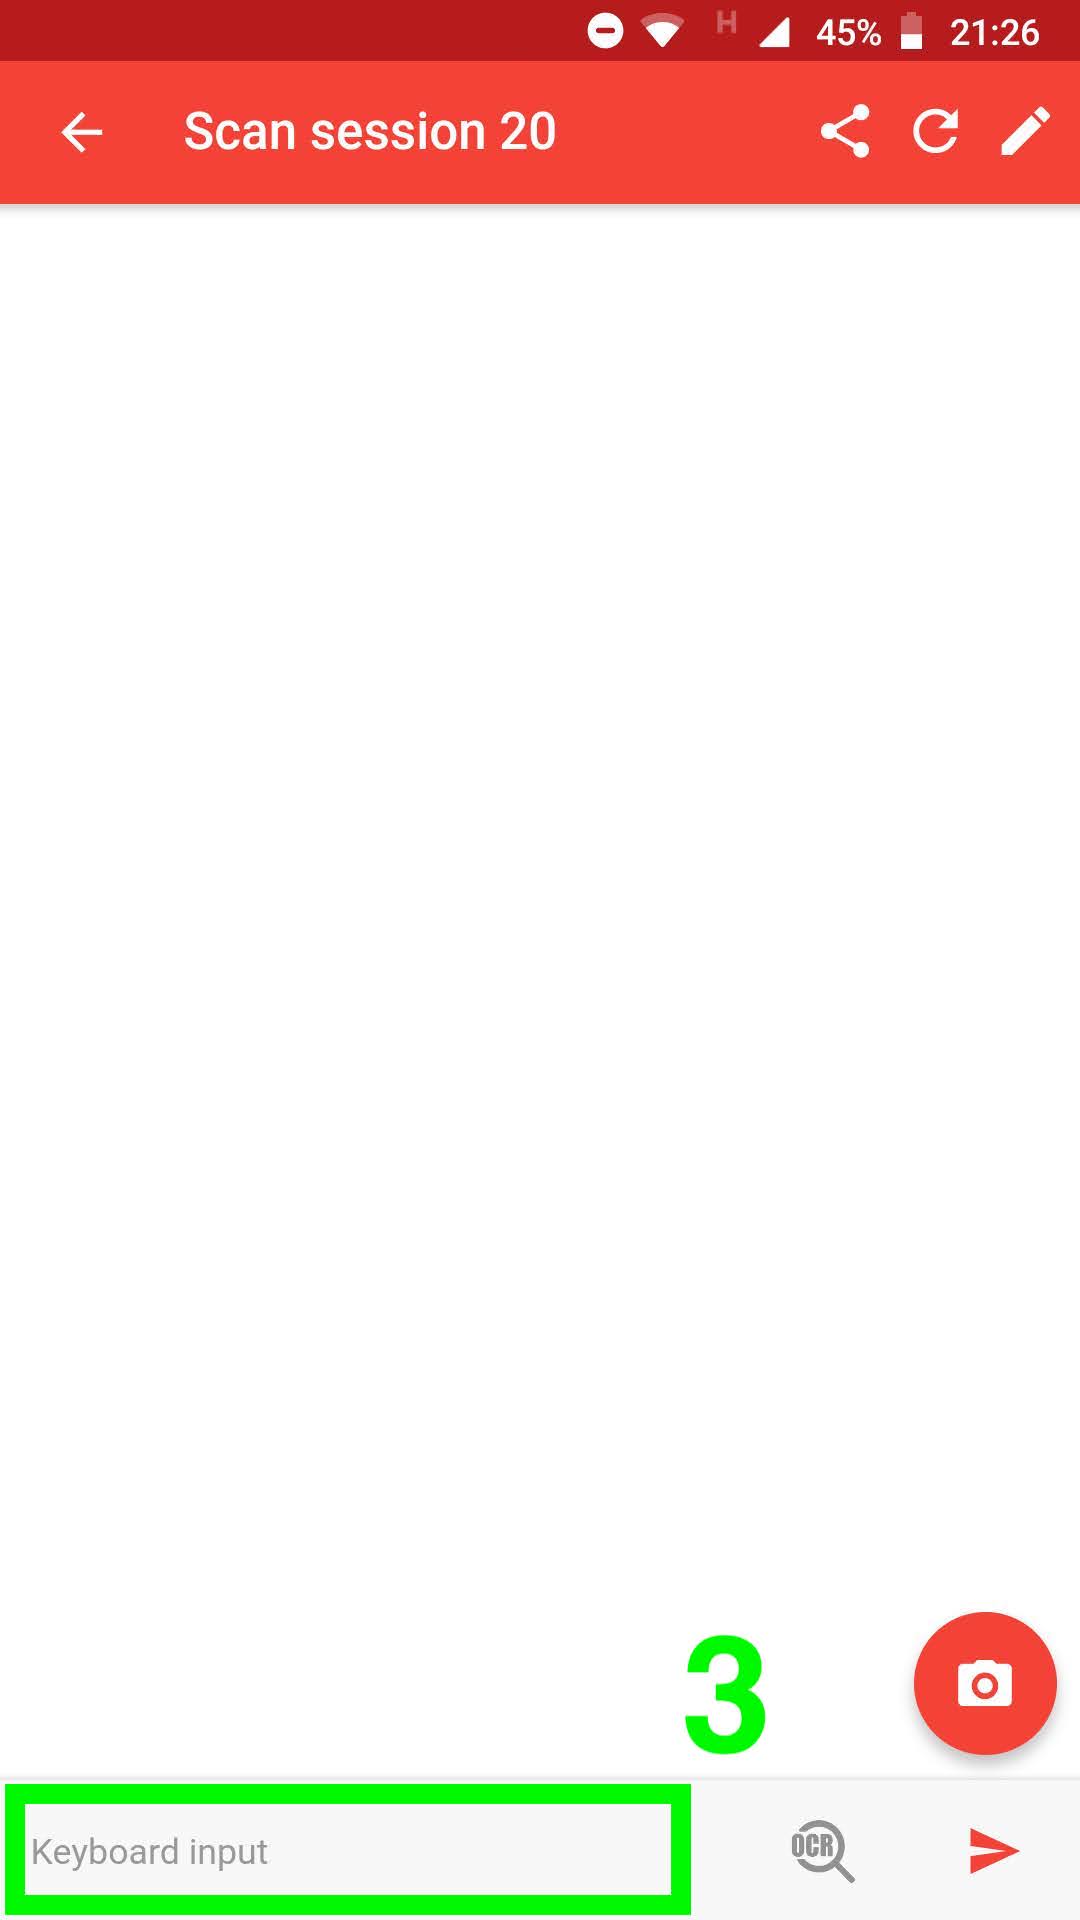
Step 3 – Scan using the device Hardware button
At this point, everything is ready to go, and you should be able to use the integrated scanner of your device to acquire barcodes.
The barcode will be automatically typed in the Keyboard input field, and then when the ENTER keypress is detected it’ll be also automatically sent to the server:
Common issues
Issue: Nothing happens when scanning with the physical scanner.
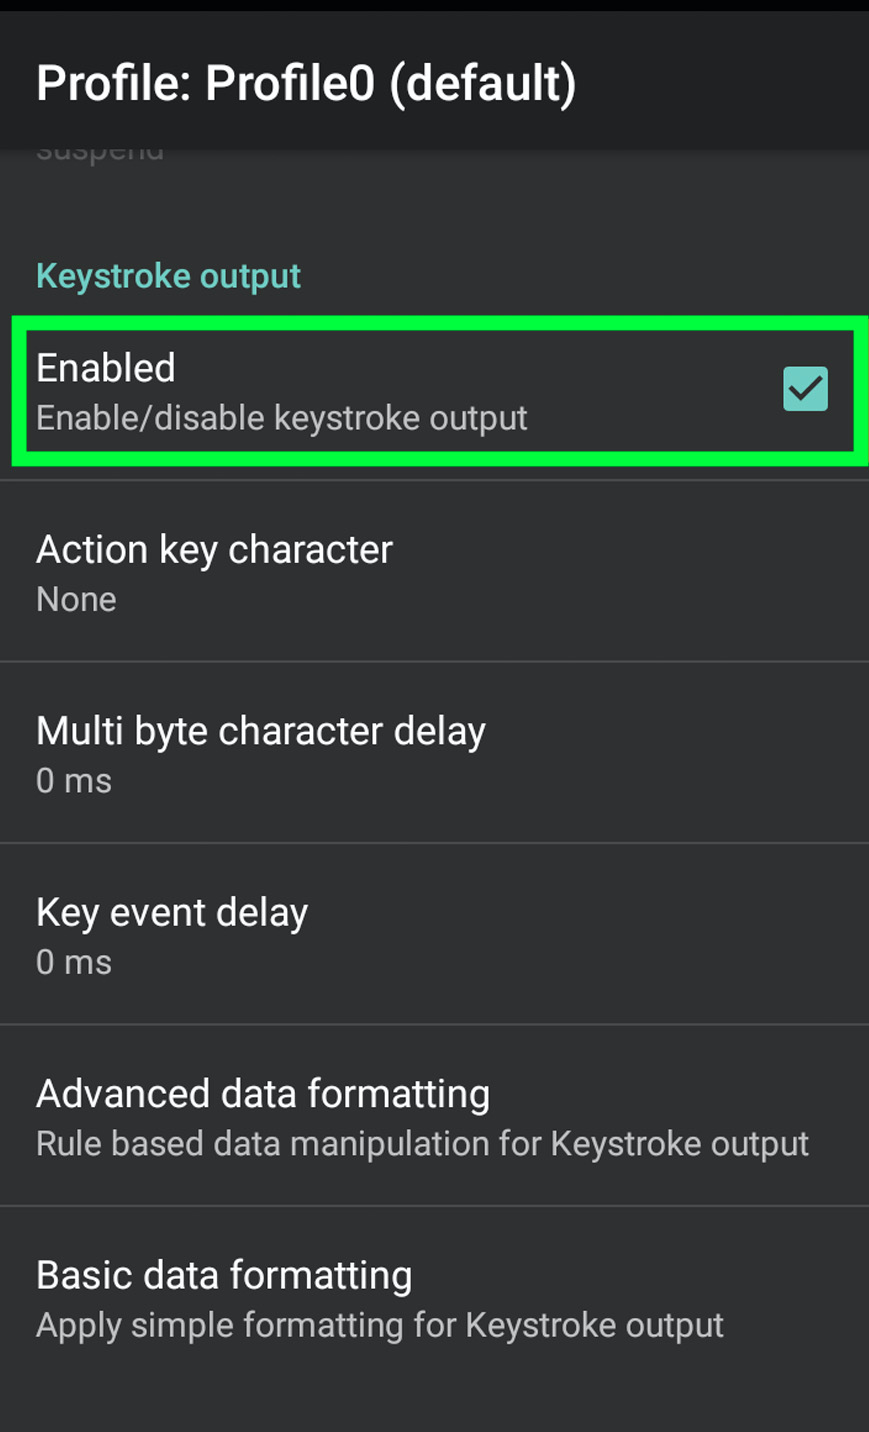
Solution: Probably the “Keystroke output” option of your device is disabled. Most Android PDA scanners can operate in two modes: keystroke output and intent.
To make it work with Barcode to PC you have to go in the System Settings of your device and enable the keystroke output mode.
This option may be called differently based on your device brand. Here you can see some examples:
Example for Zebra devices:
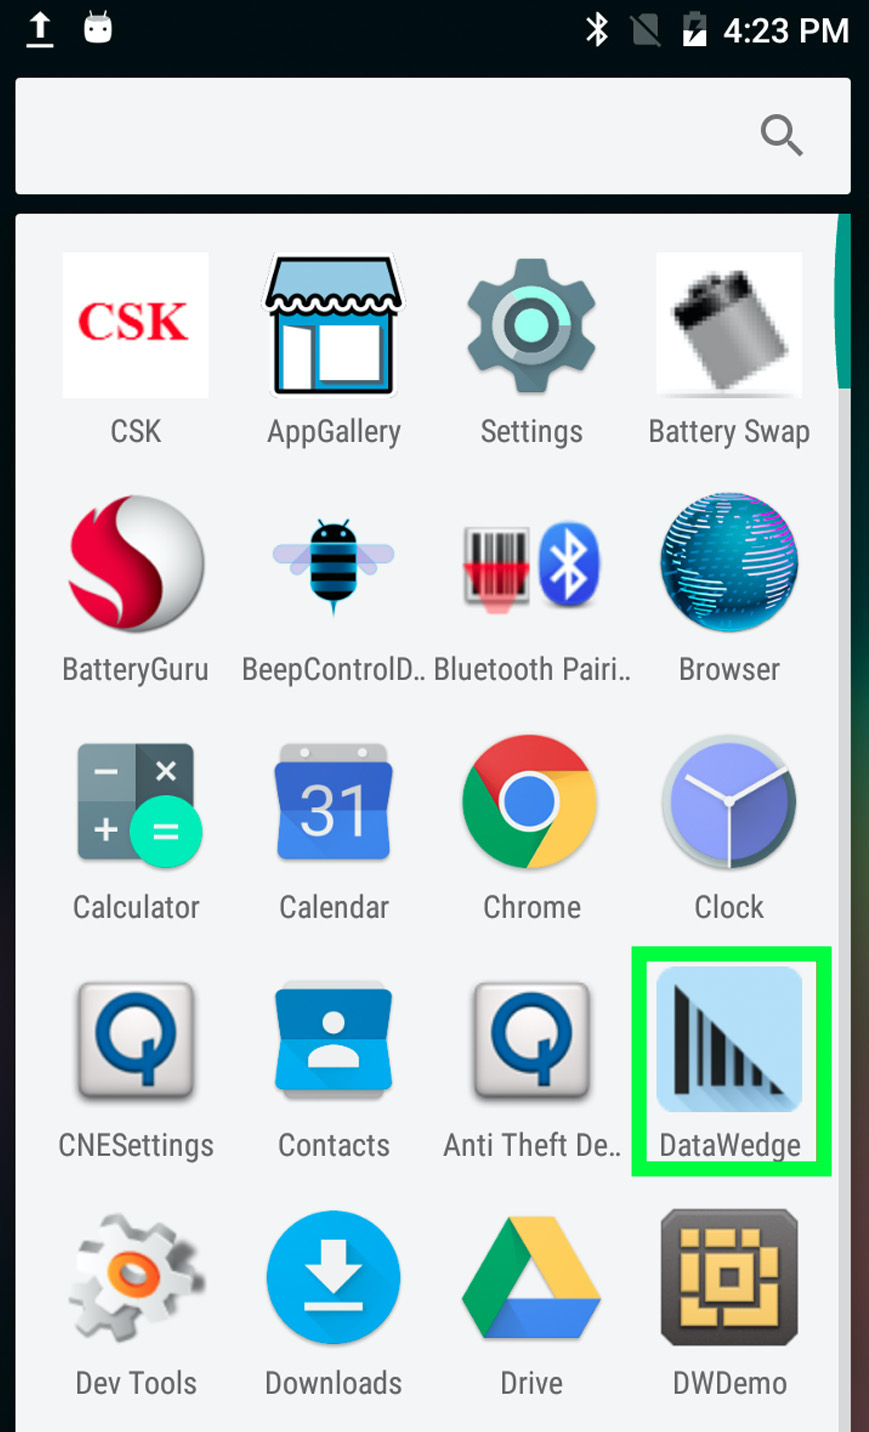
Open the Datawedge app
Enable the Keystroke output option
You can consult the official Zebra instructions here: Keystroke Output
Issue: The barcode gets typed in the Keyboard input field but it isn’t automatically sent.
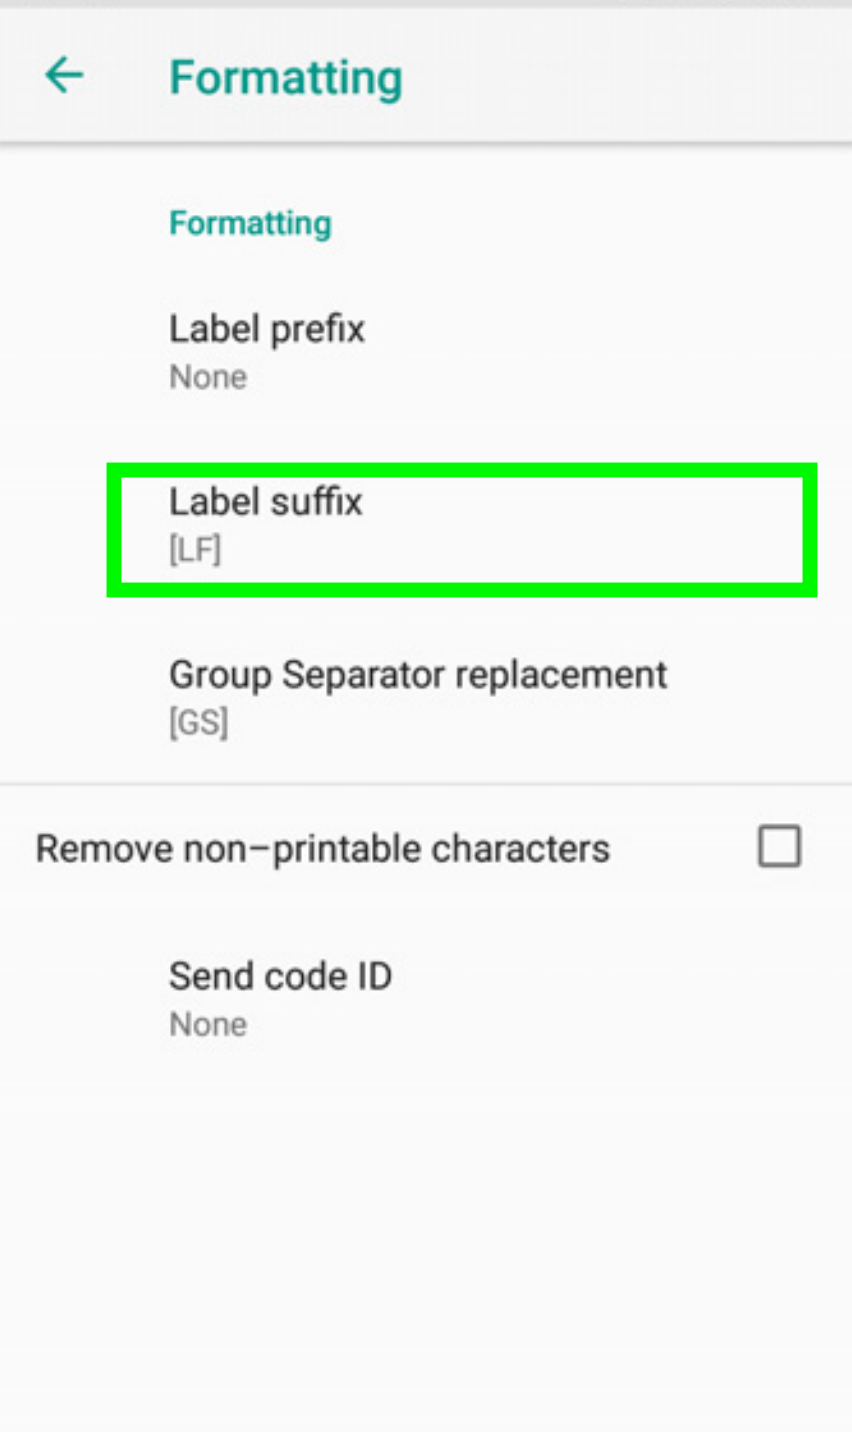
Solution: Probably the “Send ENTER key” option of your device is disabled. The “Send ENTER key” is required to be turned on, you can also find it called as “Suffix” option, and in that case, you should set it to [LF] or alternatively to [CR][LF] (to emulate an ENTER keypress). By enabling this option the barcode will be automatically sent and you won’t have to press the send button on the app.
This option may vary on your device brand, and you should be able to find it in your device System settings, examples:
Datalogic devices call the option “Suffix”
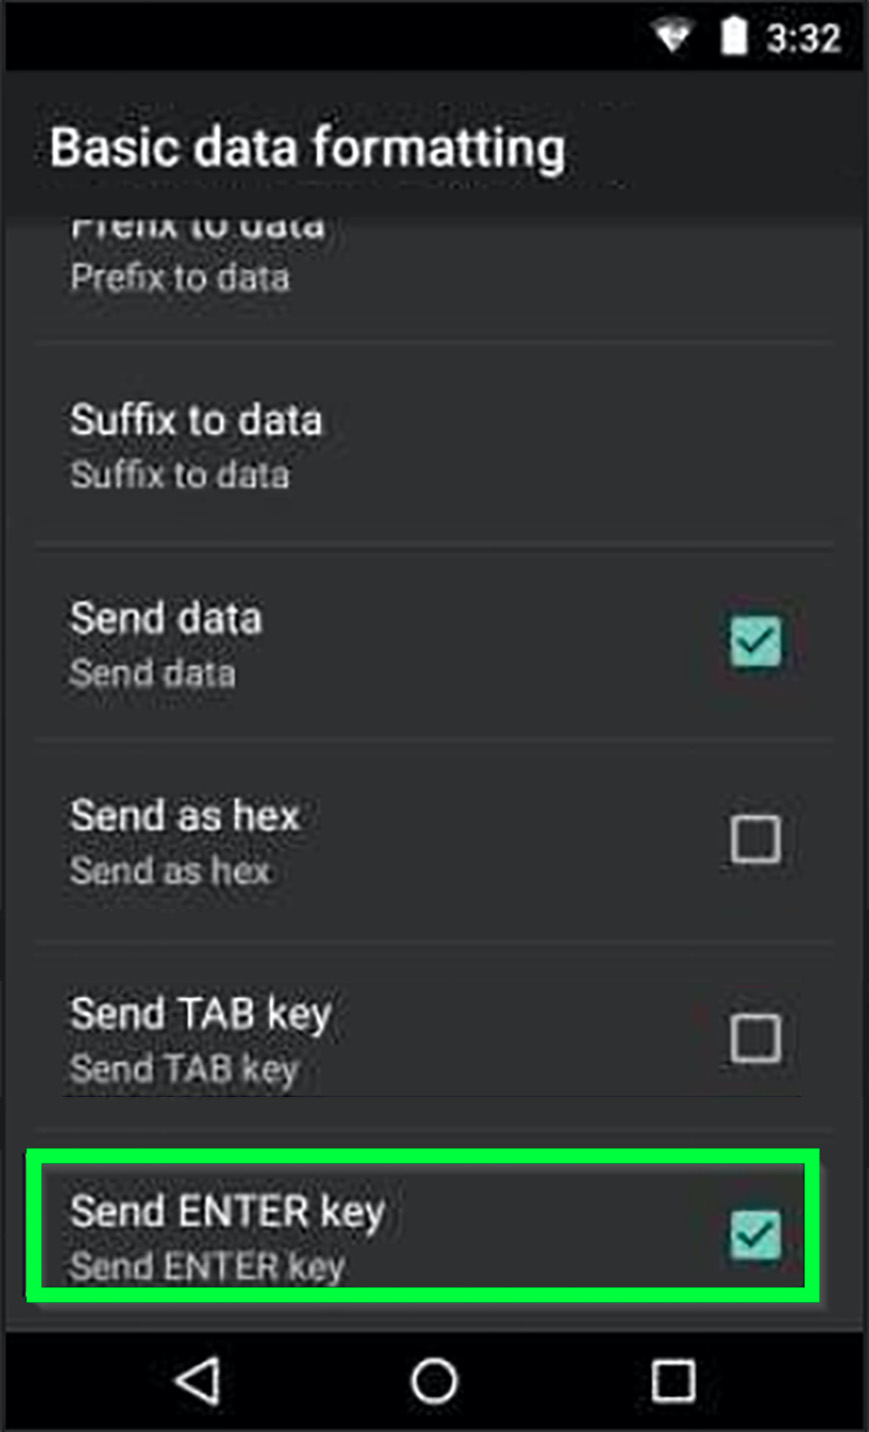
Zebra devices call the option “Send ENTER key”
You can consult the official Zebra instructions here: DataWedge for Android Send Enter or Tab after Scanning
Advantages of using Barcode to PC
 No additional costs of developing a mobile application
New software is expensive, and development takes time.
Barcode to PC helps you keep using your existing software by integrating your Android PDA device in your system.
Barcode to PC helps you keep using your existing software by integrating your Android PDA device in your system.
Portability
After you install the server program, the barcodes will be automatically typed on your computer.
Your Android Handheld device will act as a portable Wi-Fi scanner that you can always keep in your pocket.
Your Android Handheld device will act as a portable Wi-Fi scanner that you can always keep in your pocket.
Keep your existing desktop software
Barcode to PC can be easily configured to automate additional keypresses (such as TAB) to move the cursor inside the UI of your desktop software.
This can be done by creating Output Templates in the server settings.
This can be done by creating Output Templates in the server settings.