How to use the CSV_LOOKUP Component
The ![]() Output Component performs a search inside a CSV file by looking for a value inside a specific column of the file and returns the value in the same row of another column of your choice.
Output Component performs a search inside a CSV file by looking for a value inside a specific column of the file and returns the value in the same row of another column of your choice.
Once a correspondence is found the result will be redirected to the Keyboard emulation and CSV output.
In addition, the value will be accessible from the other components through the csv_lookup variable.
Parameters
| Parameter name | Description |
|---|---|
| Skip Output |
If enabled, the CSV_LOOKUP output won’t affect the Keyboard emulation and the CSV files output. |
| Search value |
The text or number to search for inside the CSV file.
You can use the values acquired by the other components by accessing the corresponding variables using the double-curly braces syntax. Available variables (lowercase):
Example of a possible Search value: |
| CSV Input file path |
The absolute file path of the CSV file to use as a source for the lookup.
Example for Windows: |
| Search Column Index | The column number (starting from 1 for the left-most column of the CSV file) that contains the values to search in |
| Result column Index | The column number (starting from 1 for the left-most column of the CSV file) that contains the values that should be returned when there is a match |
| Not Found value | The text to output when the lookup doesn’t produce results |
Output
The output value of the CSV_LOOKUP component corresponds to the item of the first row that matches the Search value field.
Example
Let’s say that you need to type the name of the items that you scan in one of your programs.
You can use the CSV_LOOKUP component to perform a real-time lookup to a CSV file and output the corresponding value.
Step 1 – Create a CSV input file
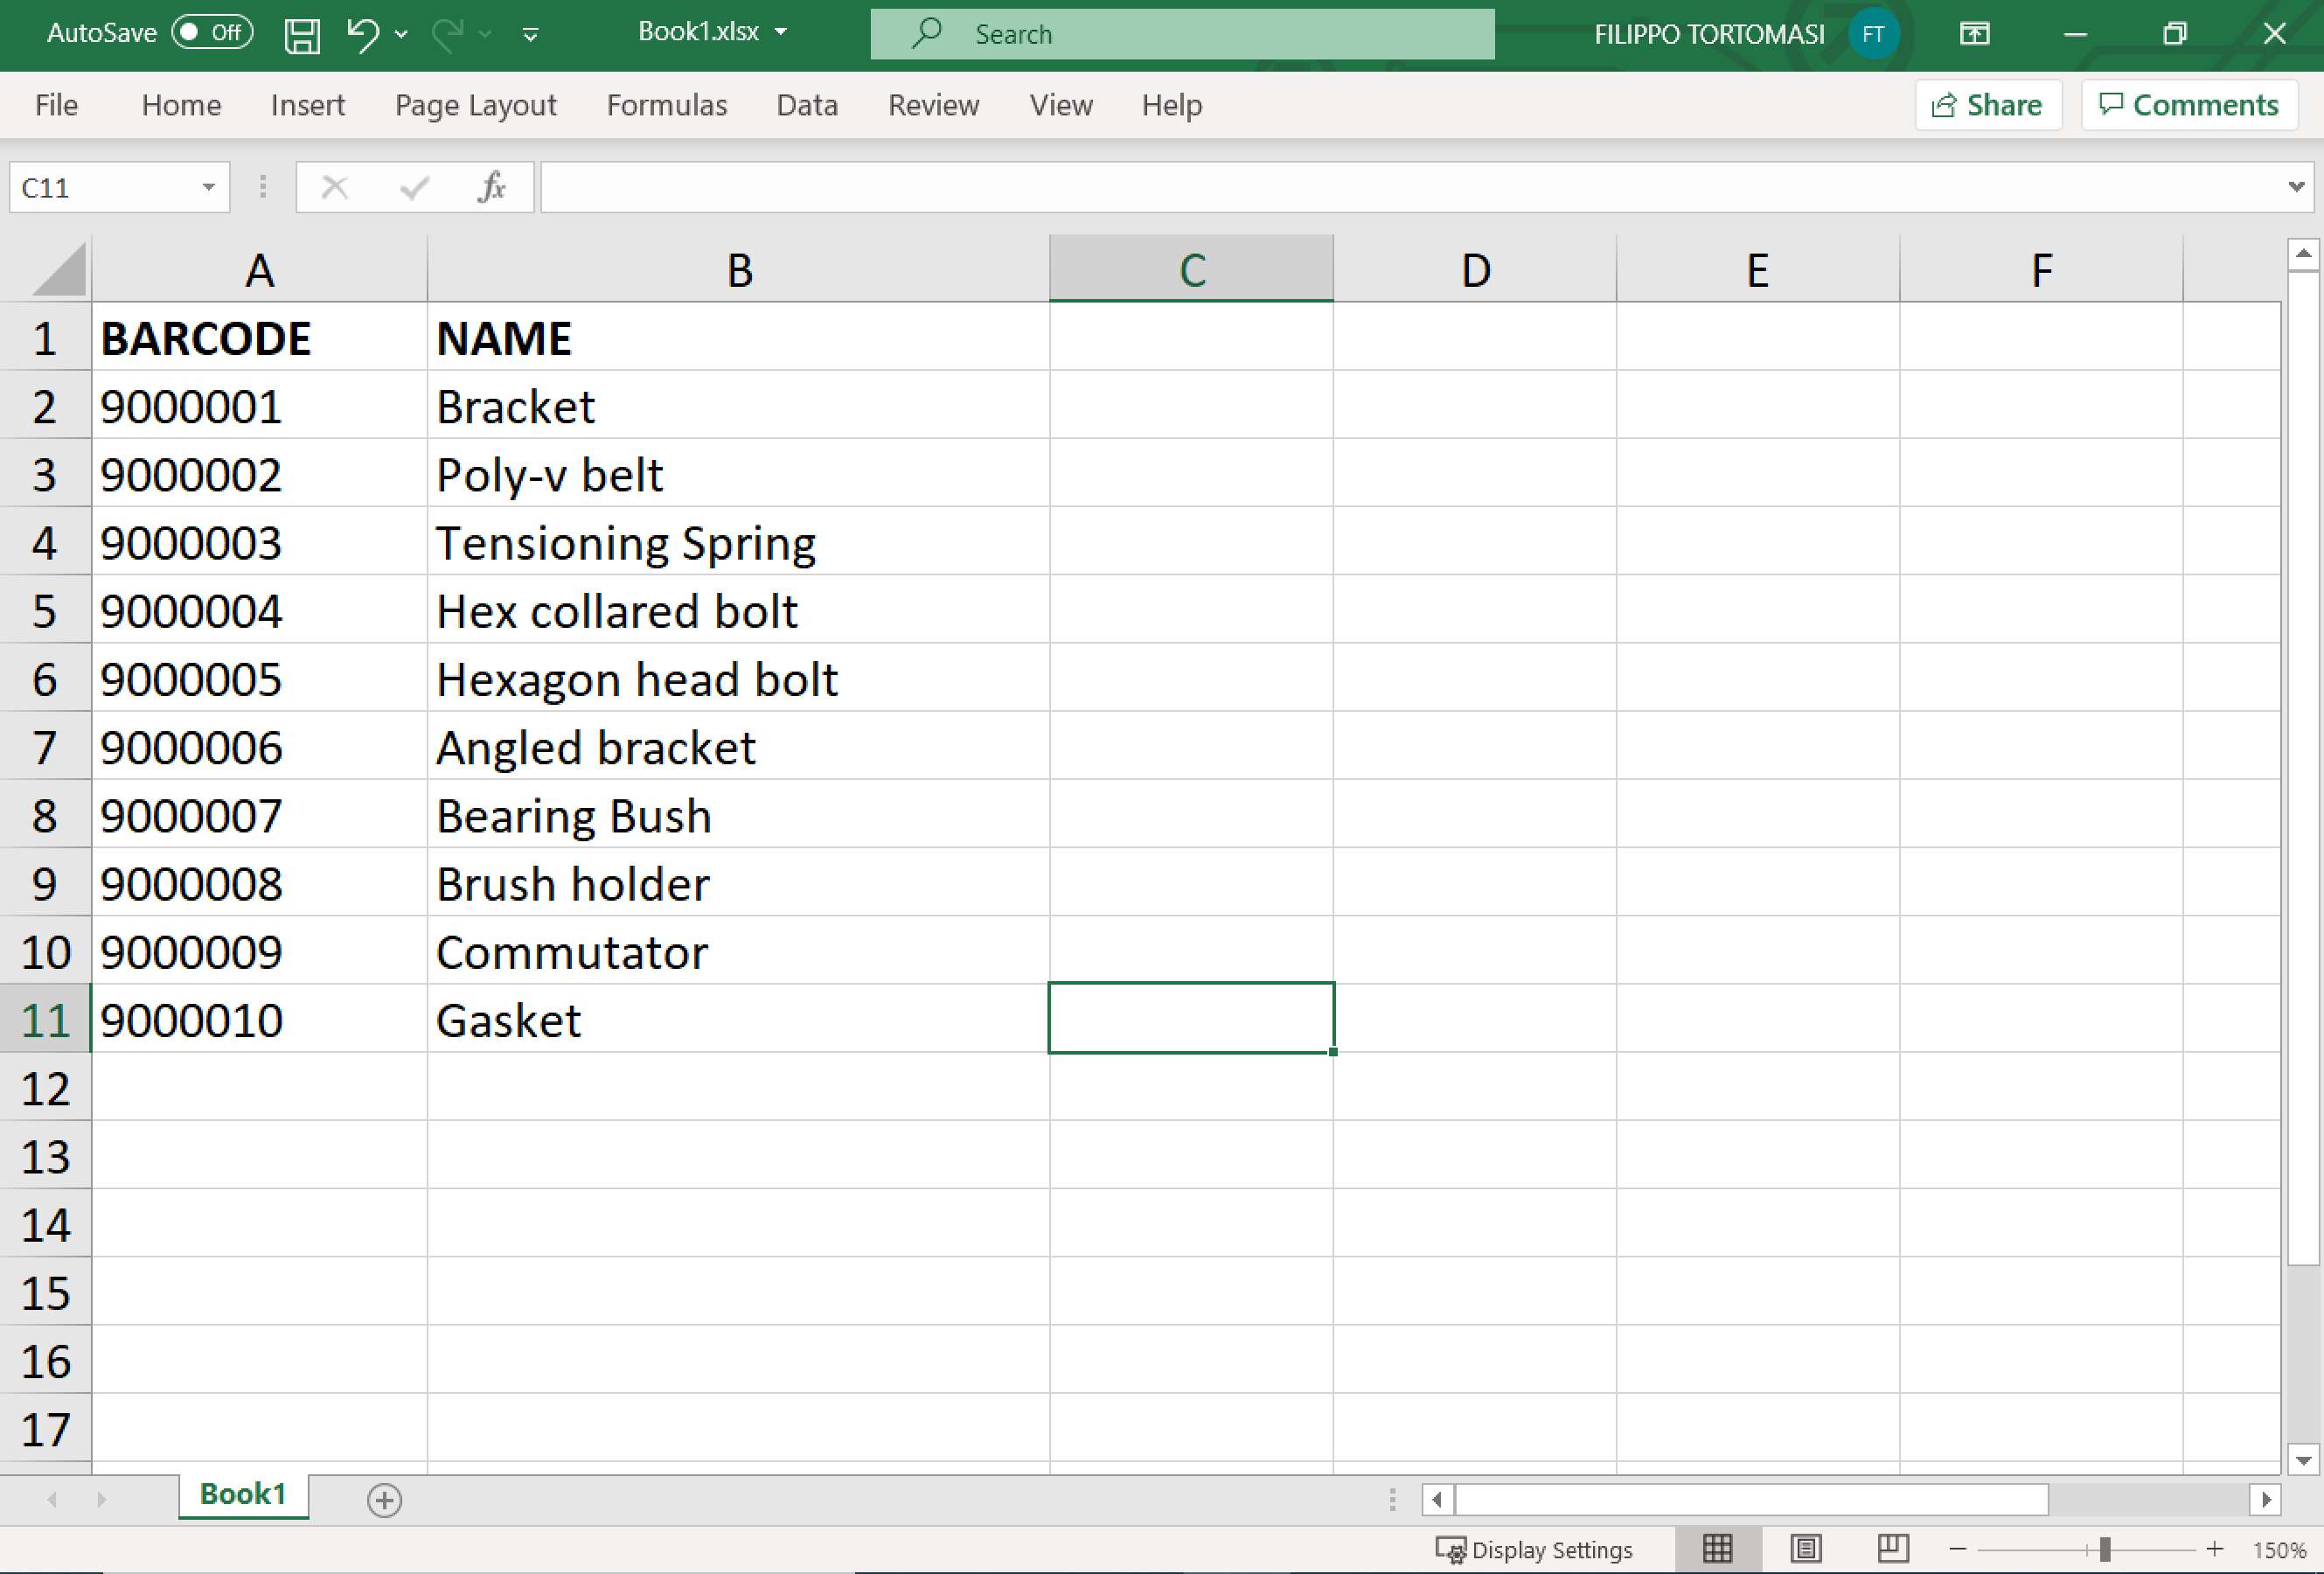
The CSV input file will act as a source of the information to associate the barcodes to the corresponding name.
In this example, we’re using Excel to create the CSV file, but you can use any other text editor like Notepad, as long as you correctly format the data as comma-separated values.
Put in the first column all the possible barcode values and in the second column the value of the name that you want to associate to each barcode, like this:
Step 2 – Save the CSV file
From the File menu select Save as, and make sure to select the .csv format, like this:
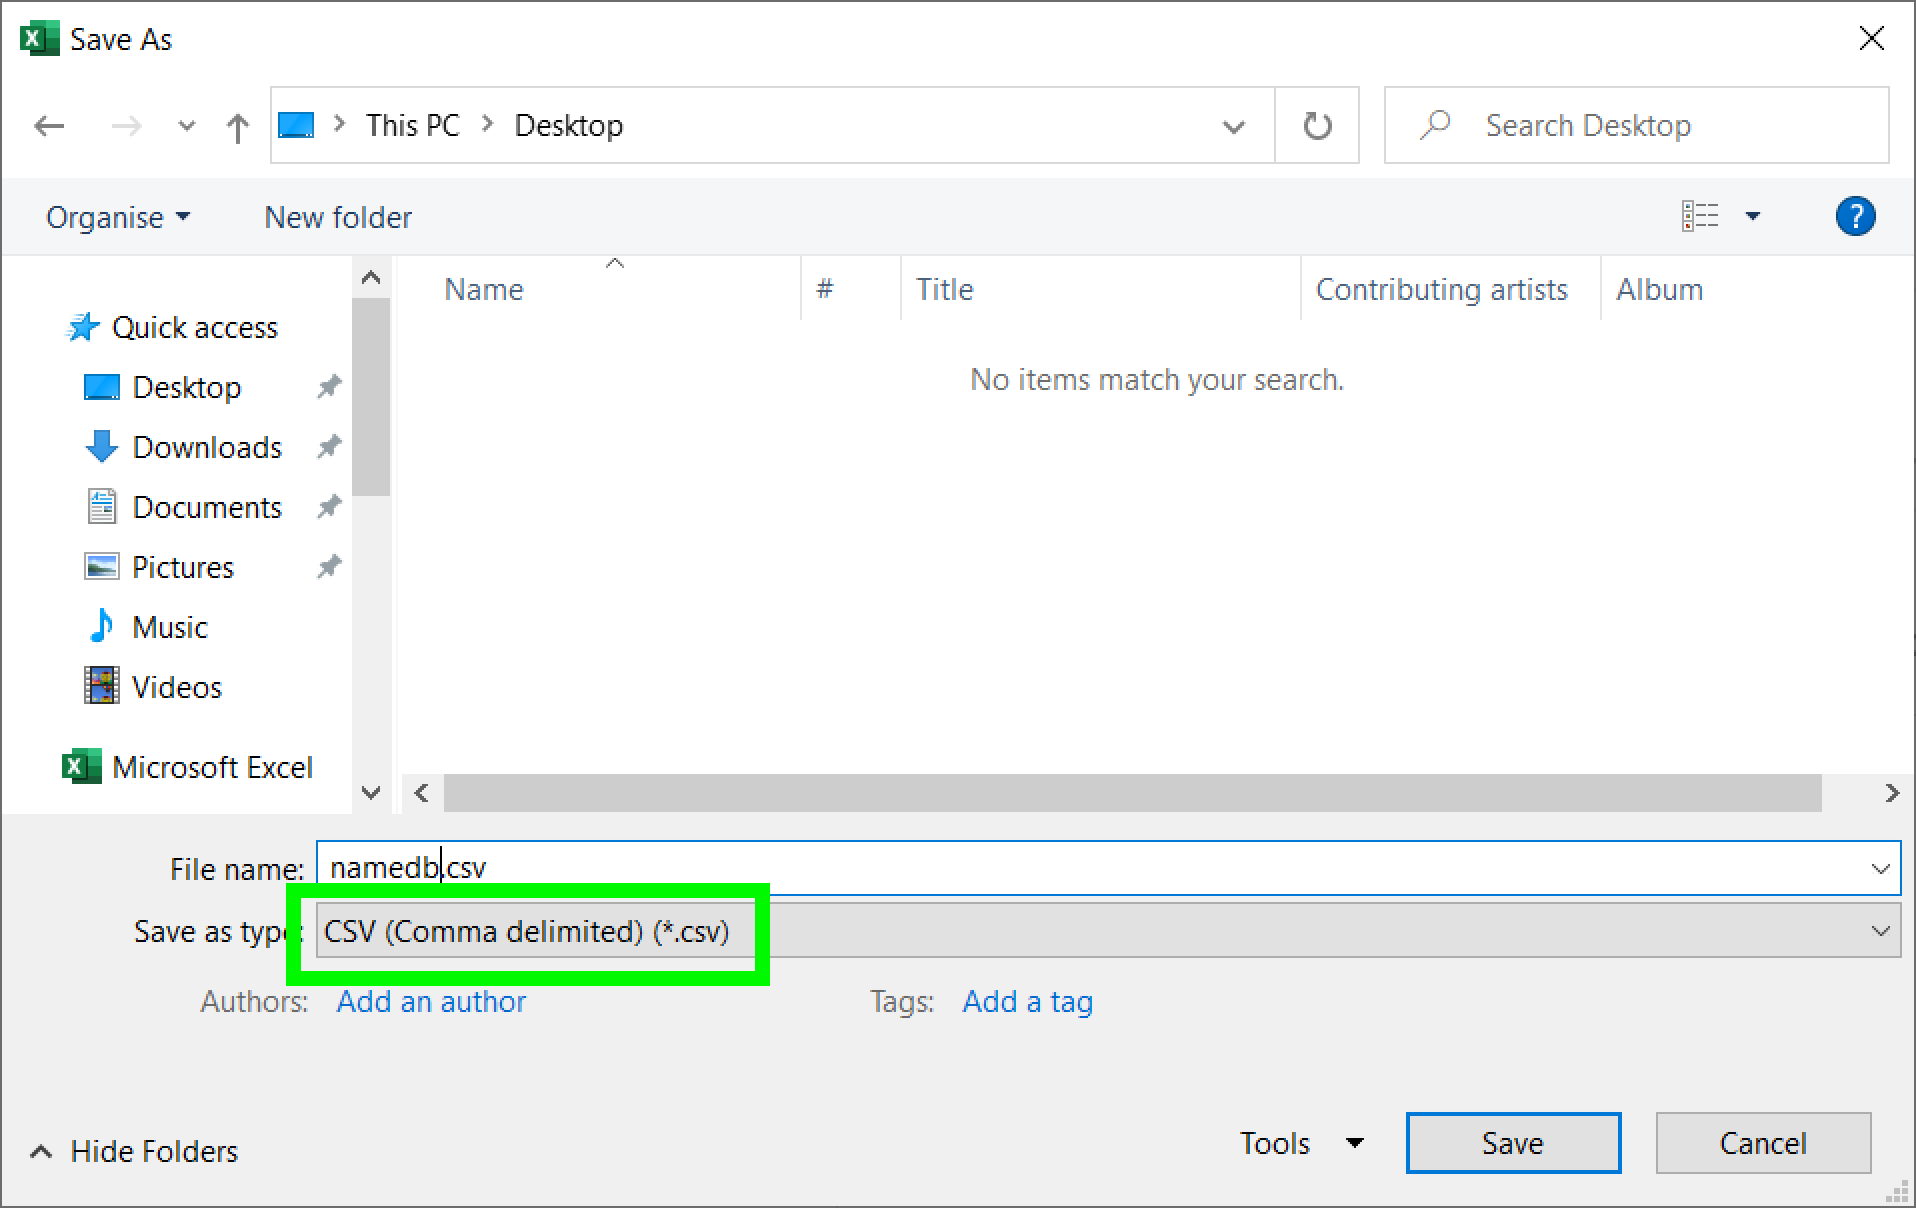
☝️ Note: Excel may save the file using the semicolon
;instead of colon,as delimiter character.
You can verify it by opening the .csv file with the Notepad program. In that case, don’t forget to set the appropriate delimiter character in the server settings shown in Step 4.
Step 3 – Add the CSV_LOOKUP component
Drag and drop the CSV_LOOKUP from the Available components filed to the Output template field, like this:
☝️Note: make sure to position the CSV_LOOKUP after the BARCODE component, otherwise it won’t be able to access the
barcodevariable.
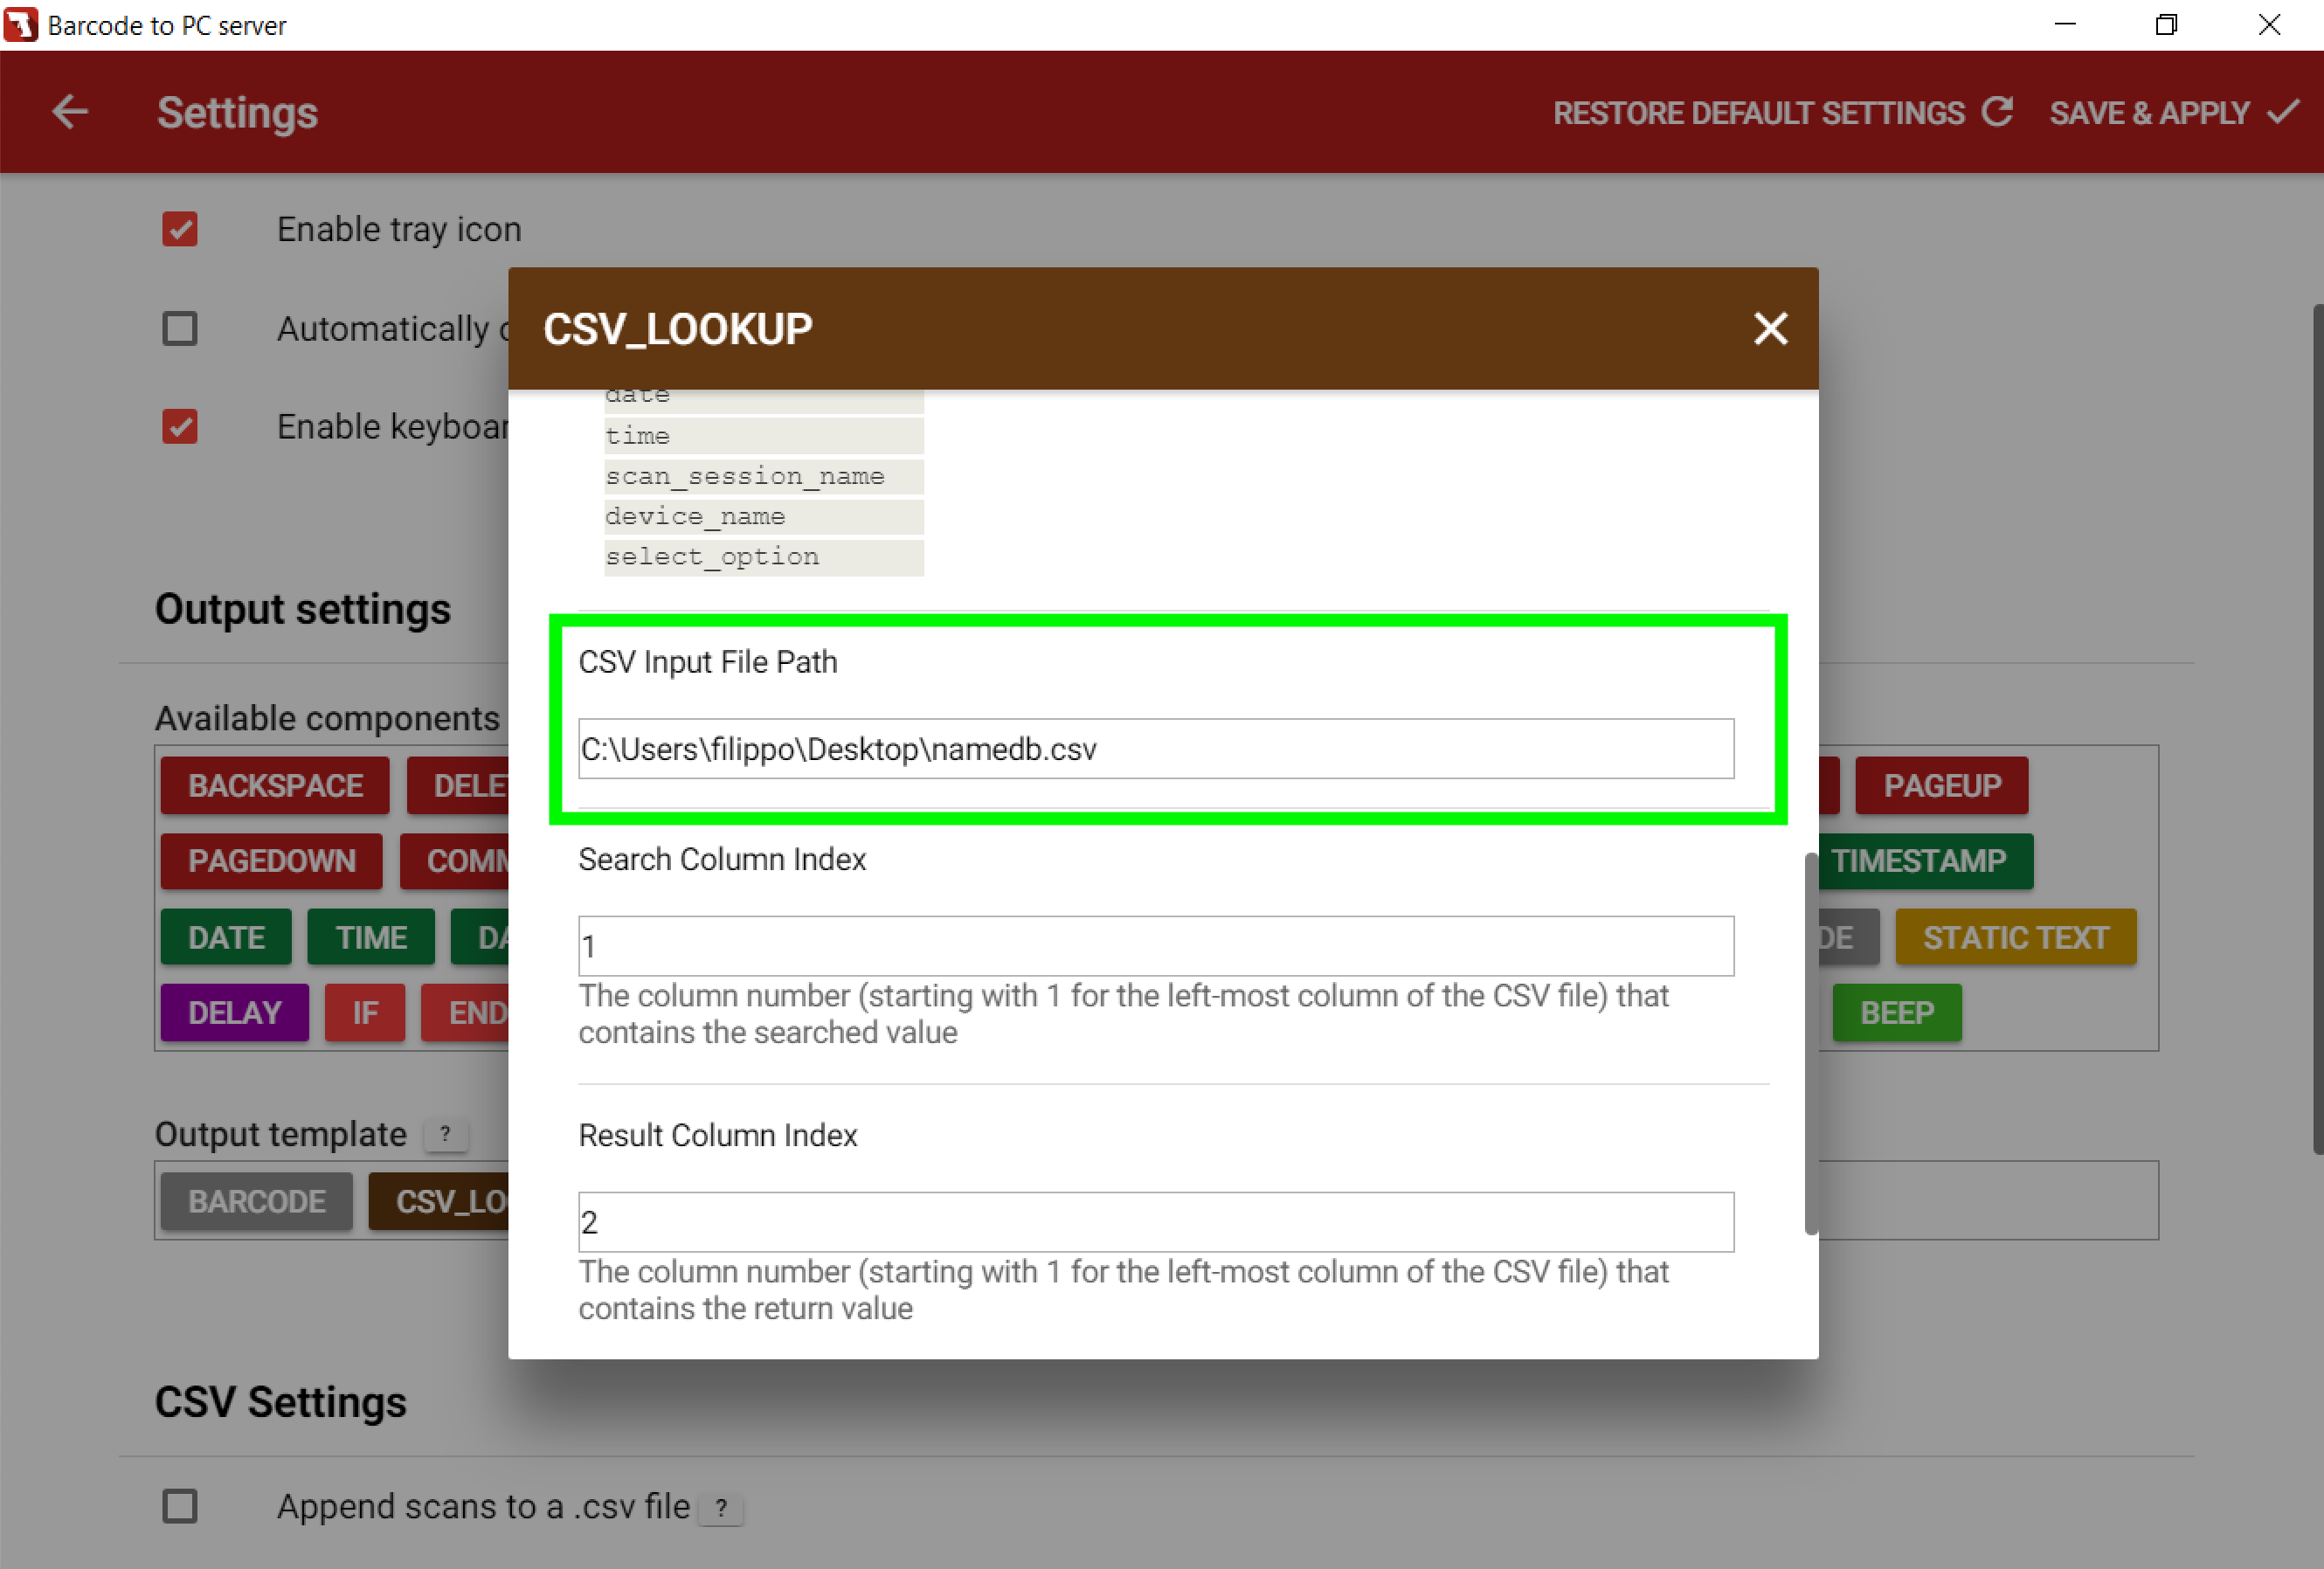
Step 4 – Configure the CSV_LOOKUP component
To edit the CSV_LOOKUP parameters click on it.
For this example, all the parameters can be left to the default value, except for the CSV Input File Path field, where you have to put the path of the file you saved in the previous step.
It should look like this: