How to Connect a Bluetooth Barcode Scanner to Your Tablet
A systems administrator recently reached out with a challenge: “We connected a wireless Bluetooth barcode scanner to our tablet, but the Barcode to PC app keeps opening the camera instead of reading from the scanner.” This is one of the most common questions we receive, and fortunately, the solution is straightforward once you understand how the app handles different input methods.
This case study walks through the process of properly configuring Barcode to PC to work with external Bluetooth scanners, wireless devices, and Android PDA devices with integrated laser scanners. Whether you’re setting up a warehouse operation, retail point-of-sale system, or inventory management workflow, understanding these configuration options will save you significant troubleshooting time.
Why Does the App Open the Camera Instead of Using My Scanner?
When you first connect a Bluetooth barcode scanner to your tablet or smartphone, you might expect the app to automatically detect and use it. However, Barcode to PC has three different scan modes, each designed for specific hardware configurations:
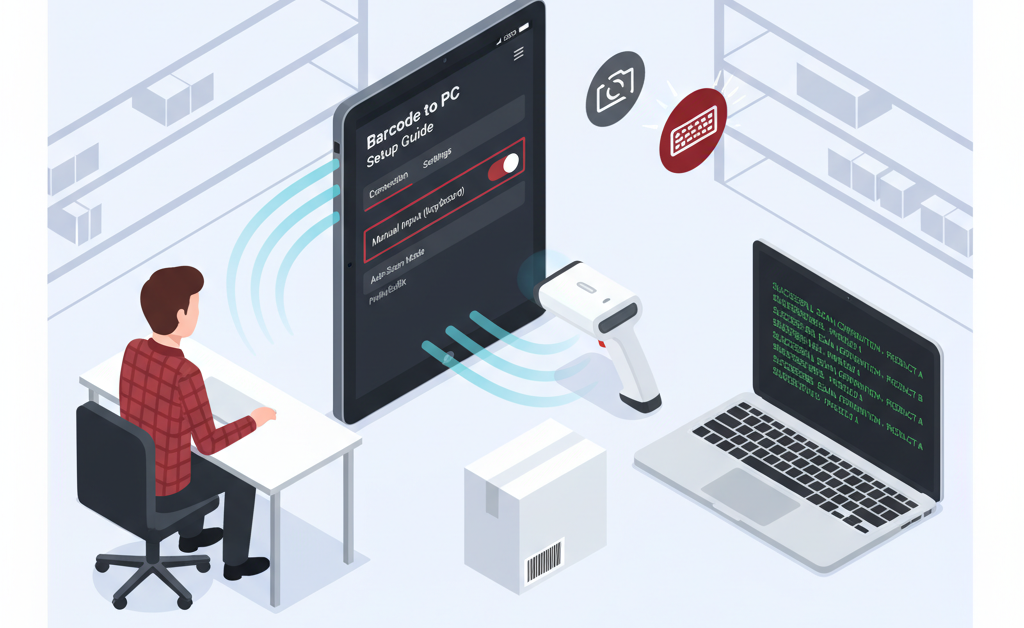
- Single Scan mode – Uses the device’s built-in camera to scan one barcode at a time
- Continuous Scan mode – Uses the camera to scan multiple barcodes in succession
- Manual Input mode – Receives input from external devices like Bluetooth scanners, USB scanners, or integrated laser scanners
If your app is opening the camera when you press the scan button, it means you’re currently in Single Scan or Continuous Scan mode. The fix is simple: you need to switch to Manual Input mode to tell the app to expect keyboard input from your external scanner rather than camera-based scanning.
The Solution: Switch to Manual Input Mode
Here’s the step-by-step process to configure your app for external scanner input:
Step 1: Open the Barcode to PC app settings
Launch the Barcode to PC app on your Android tablet or smartphone, then tap the menu icon and select Settings.
Step 2: Navigate to the Scan Mode setting
Go to Settings > General > Scan mode
Step 3: Select “Manual Input (keyboard)”
Change the scan mode from “Single Scan” or “Continuous Scan” to “Manual Input (keyboard)”. This tells the app to listen for keyboard input instead of activating the camera.
Step 4: Return to the main screen
Once you’ve made this change, go back to the main scanning interface. You’ll notice the input field is now ready to receive data from your external scanner.
Step 5: Test your scanner
Point your Bluetooth scanner at a barcode and pull the trigger. The scanned data should now appear in the input field and be sent to your computer automatically.
Does This Work with All Types of External Scanners?
Yes! This configuration method works with a wide variety of barcode scanning hardware:
Bluetooth Wireless Scanners
Any Bluetooth barcode scanner that pairs with your Android device as a keyboard input device will work. This includes popular models from Honeywell, Symbol, Zebra, and Socket Mobile. Once paired via Bluetooth settings, simply switch to Manual Input mode in the app.
USB Wired Scanners
If your tablet or smartphone supports USB OTG (On-The-Go), you can connect wired barcode scanners using an adapter. These typically appear as keyboard devices and work immediately in Manual Input mode.
Android PDA Devices with Integrated Scanners
Devices like Zebra TC series, Honeywell Dolphin, or Datalogic Memor have built-in laser scanners. These professional-grade devices require the same Manual Input configuration, though some (like Zebra devices) may need additional DataWedge profile setup for optimal performance.
Ring Scanners and Wearable Devices
Compact wearable scanners that connect via Bluetooth also work with this method, making them ideal for hands-free warehouse operations.
What If Manual Input Mode Still Doesn’t Work?
If you’ve switched to Manual Input mode but your scanner still isn’t working properly, here are the most common issues and their solutions:
Scanner Not Sending Enter Key After Barcode
The app expects each scan to be followed by an Enter key (carriage return) to automatically submit the data. Check your scanner’s configuration manual to enable the “suffix” or “enter key” option. This is sometimes labeled as CR, LF, or CRLF in scanner settings.
Data Appearing in Wrong Application
If scan data is appearing in other apps instead of Barcode to PC, make sure the Barcode to PC app is in the foreground and the input field has focus when you scan. Some scanners can be configured to always send data to the active application.
Bluetooth Connection Drops Frequently
Wireless scanner connection issues are usually related to battery levels or range. Ensure your scanner is fully charged and within recommended distance (typically 10-30 feet depending on the model). Some tablets also have power-saving features that can interfere with Bluetooth connections.
Special Characters or Prefixes Appearing in Scans
Some scanners add prefix or suffix characters by default. You can usually disable these in the scanner’s configuration menu, or you can use Barcode to PC’s BARCODE component with filters to clean up the data automatically.
Advanced Setup: Creating an Efficient Scanning Workflow
Once your scanner is working correctly, you can enhance your workflow with Barcode to PC’s output templates. Here’s a practical example for a warehouse receiving operation:
Basic Receiving Template
Create an output template with these components:
- BARCODE – Captures the product code from your scanner
- DATE_TIME – Automatically timestamps each scan
- NUMBER – Prompts the operator to enter quantity received
This simple three-component template creates a structured workflow: scan the product barcode with your Bluetooth scanner, then the app automatically prompts for quantity input. Each entry is timestamped and can be sent to a CSV file in real-time or typed into your inventory management software using keyboard emulation.
Adding Validation
For critical operations, you can add data validation to prevent errors. Use the BARCODE component’s filter option to ensure scanned codes match your expected format, or add an ALERT component to provide immediate feedback to the scanner operator when items are successfully processed.
Getting Started with Your External Scanner Setup
Ready to connect your Bluetooth barcode scanner? Follow this checklist:
- Pair your Bluetooth scanner with your Android tablet through system Bluetooth settings
- Open Barcode to PC and go to Settings > General > Scan mode
- Select “Manual Input (keyboard)” mode
- Verify your scanner sends an Enter key after each scan (check scanner manual if needed)
- Test scanning a barcode – it should appear in the input field and send automatically
- Configure your output template with the data fields you need
- Set up CSV output or keyboard emulation based on your workflow
- Train your team on the new scanning process
This configuration works whether you’re using a single tablet for occasional inventory checks or deploying a fleet of rugged Android PDA devices across a large warehouse. The key is understanding that external scanners function as keyboard input devices, and Manual Input mode tells Barcode to PC to listen for that input instead of activating the camera. Once configured correctly, your external scanner will integrate seamlessly with all of Barcode to PC’s powerful features, from real-time CSV logging to custom output templates and automated data validation.